AWS Management using Terraform and CircleCI
I’ve been using Hashicorp’s Terraform to provision AWS infrastructure for a while now. It has a nicer syntax than traditional AWS cloudformation scripts, and I particularly like the ability to dry run a deployment through plan to see the implication of a change before deploying to production. Terraform stores the current state of your infrastructure in a state file that can either be stored locally or remotely in either Atlas, Consul or S3.
In order to restrict direct access to my production environment I wanted to force all infrastructure changes to occur via a continuous deployment pipeline in the same way I do for code changes. My current favourite CI tool is CircleCI and so I used that to control the changes, and as I was already using AWS I decided to use S3 to store my remote Terraform state. The flow would look something like this:

The great thing with this is that you only need access to the GitHub repository to push changes into production. No secret keys are needed outside of CircleCI, and all changes are audited within GitHub.
How
I’m assuming that you already have AWS and GitHub accounts. The main steps are:
- create an S3 bucket to store Terraform state
- create an IAM user for CircleCI to use for deployment and state management
- create a GitHub repository to store Terraform configuration
- add and configure repository into CircleCI
I’ll show examples of each in turn:
Create an S3 Bucket to Store Terraform State
Once you have logged into your AWS Management Console, navigate to S3 and add a new bucket to store the Terraform state. I’ll assume you named it “my.bucket”. By default the bucket is private. We will configure access to an IAM user next.
Create an IAM User for CircleCI to use for Deployment and State Management
Navigate to IAM home, select “Users” and click “Create New Users”. Choose a name for your new user, ensure “Generate and access key for each user” is checked and click “Create”.
At this point you can download the credentials and click close. You will need the Access Key ID and Secret Access Key from this file when configuring CircleCI later.
The final steps are to give this user permissions to add AWS resources and access the S3 bucket previously created. Select the newly created user and under “Permissions” add the policy called AmazonVPCFullAccess. This will allow the user to provision infrastructure. Once complete the screen should look like the following:

Finally you need to grant the user access to the S3 bucket previously created. You will need to click “Create User Policy”, Select “Custom Policy” and add the following configuration:
{
  "Version": "2012-10-17",
  "Statement": [
    {
      "Effect": "Allow",
      "Action": [
        "s3:*"
      ],
      "Resource": [
        "arn:aws:s3:::my.bucket",
        "arn:aws:s3:::my.bucket/*"
      ]
    },
    {
      "Effect": "Allow",
      "Action": "s3:ListAllMyBuckets",
      "Resource": "arn:aws:s3:::*"
    }
  ]
}
Note that the above script assumes you have created a bucket called “my.bucket”, so please change accordingly.
Create a GitHub Repository to Store Terraform Configuration
Create a repository, public or private, within GitHub. Take a look at terrapin for an example. It will need three files:
.gitignore
To ensure you don’t check in any state files, you should exclude the following:
*.tfstate
*.backup
default.tf
This contains your Terraform configuration. My example only adds a new VPC:
provider "aws" {
  region = "us-east-1"
}

resource "aws_vpc" "minimal" {
  cidr_block = "10.0.0.0/16"
  tags {
    Name = "minimal"
  }
}
circle.yml
This contains your CircleCI configuration. It installs the Terraform CLI, configures the remote S3 bucket and deploys changes.
dependencies:
  pre:
    - wget https://dl.bintray.com/mitchellh/terraform/terraform_0.6.3_linux_amd64.zip
    - unzip terraform_0.6.3_linux_amd64.zip

test:
  override:
    - ./terraform remote config -backend=S3 -backend-config="bucket=$BUCKET" -backend-config="key=terraform.tfstate" -backend-config="region=us-east-1"
    - ./terraform plan -out=terraform.plan

deployment:
  production:
    branch: master
    commands:
      - ./terraform apply terraform.plan
      - ./terraform remote push
Add and Configure the Repository into CircleCI
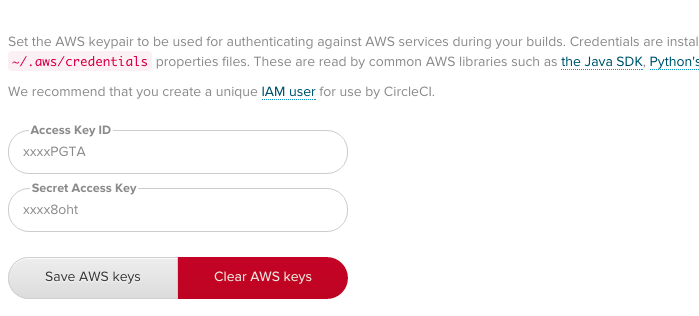
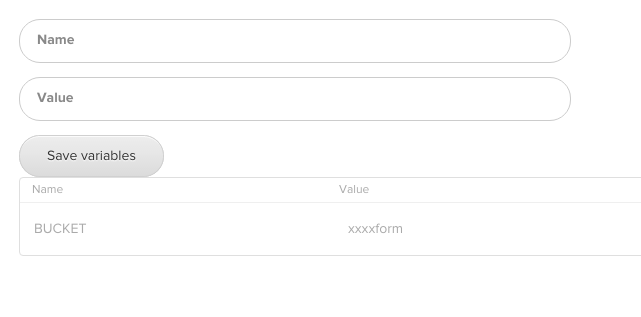
First add your repository to CircleCI following their instructions. Once you have done that, you need to add the AWS secrets by selecting “Project Settings” and “AWS Permissions”. You need to add the keys you downloaded when creating the IAM user. Your screen should look something like this:  Finally you need to add the bucket name to an environment variable called “BUCKET”. Select “Environment Variables” and add it. Your screen will now look like this.
That’s It!
All done. Now when you commit changes to the default.tf configuration file in GitHub they are propagated by CircleCI. The only access you need is to your new repository, and all changes are audited within GitHub.
Please let me know if you find this useful!